저희 집에는 꺼내놓고 사용하는 리모콘이 너무 많습니다.
주로 사용하는 리모콘을 나열해보자면 티비, 미박스, 사운드바, 빔프로젝터 정도가 됩니다.
요새는 스마트티비가 허브 역할을 하기 때문에 굳이 통합리모컨이 필요가 없지만 저희집은 구형티비를 사용하기 때문에 각각의 리모컨을 하나로 묶어 줄 필요가 있었습니다.
스마트폰으로 제어할 수 있는 통합리모컨허브 제품도 많이 있고 사용도 해봤지만..
그런 제품들이 저에게는 굉장히 불편했습니다.
스마트폰으로 제어하는 제품들은 아무래도 물리적인 버튼을 누르는 리모컨만큼 편하지는 않습니다.
적외선 신호를 기록할 수 있는 실물 리모컨형태로도 나와 있는 제품이 있긴 했지만 기기를 전환하기가 불편하고 제가 가진 기기들에 적용하기가 버튼배치가 아쉽거나 지정 가능한 기기의 수가 한정되어 있더군요.
제 입맛에 딱 맞는것을 찾기란 거의 불가능하다는 것을 깨닫고 직접 통합 리모콘을 만들기로 결심했습니다.
본체는 포맥스로 간단하게 잘라서 만들고 아두이노와 IR송수신기 모듈정도만 납땜하여 넣으면 될것 같네요.
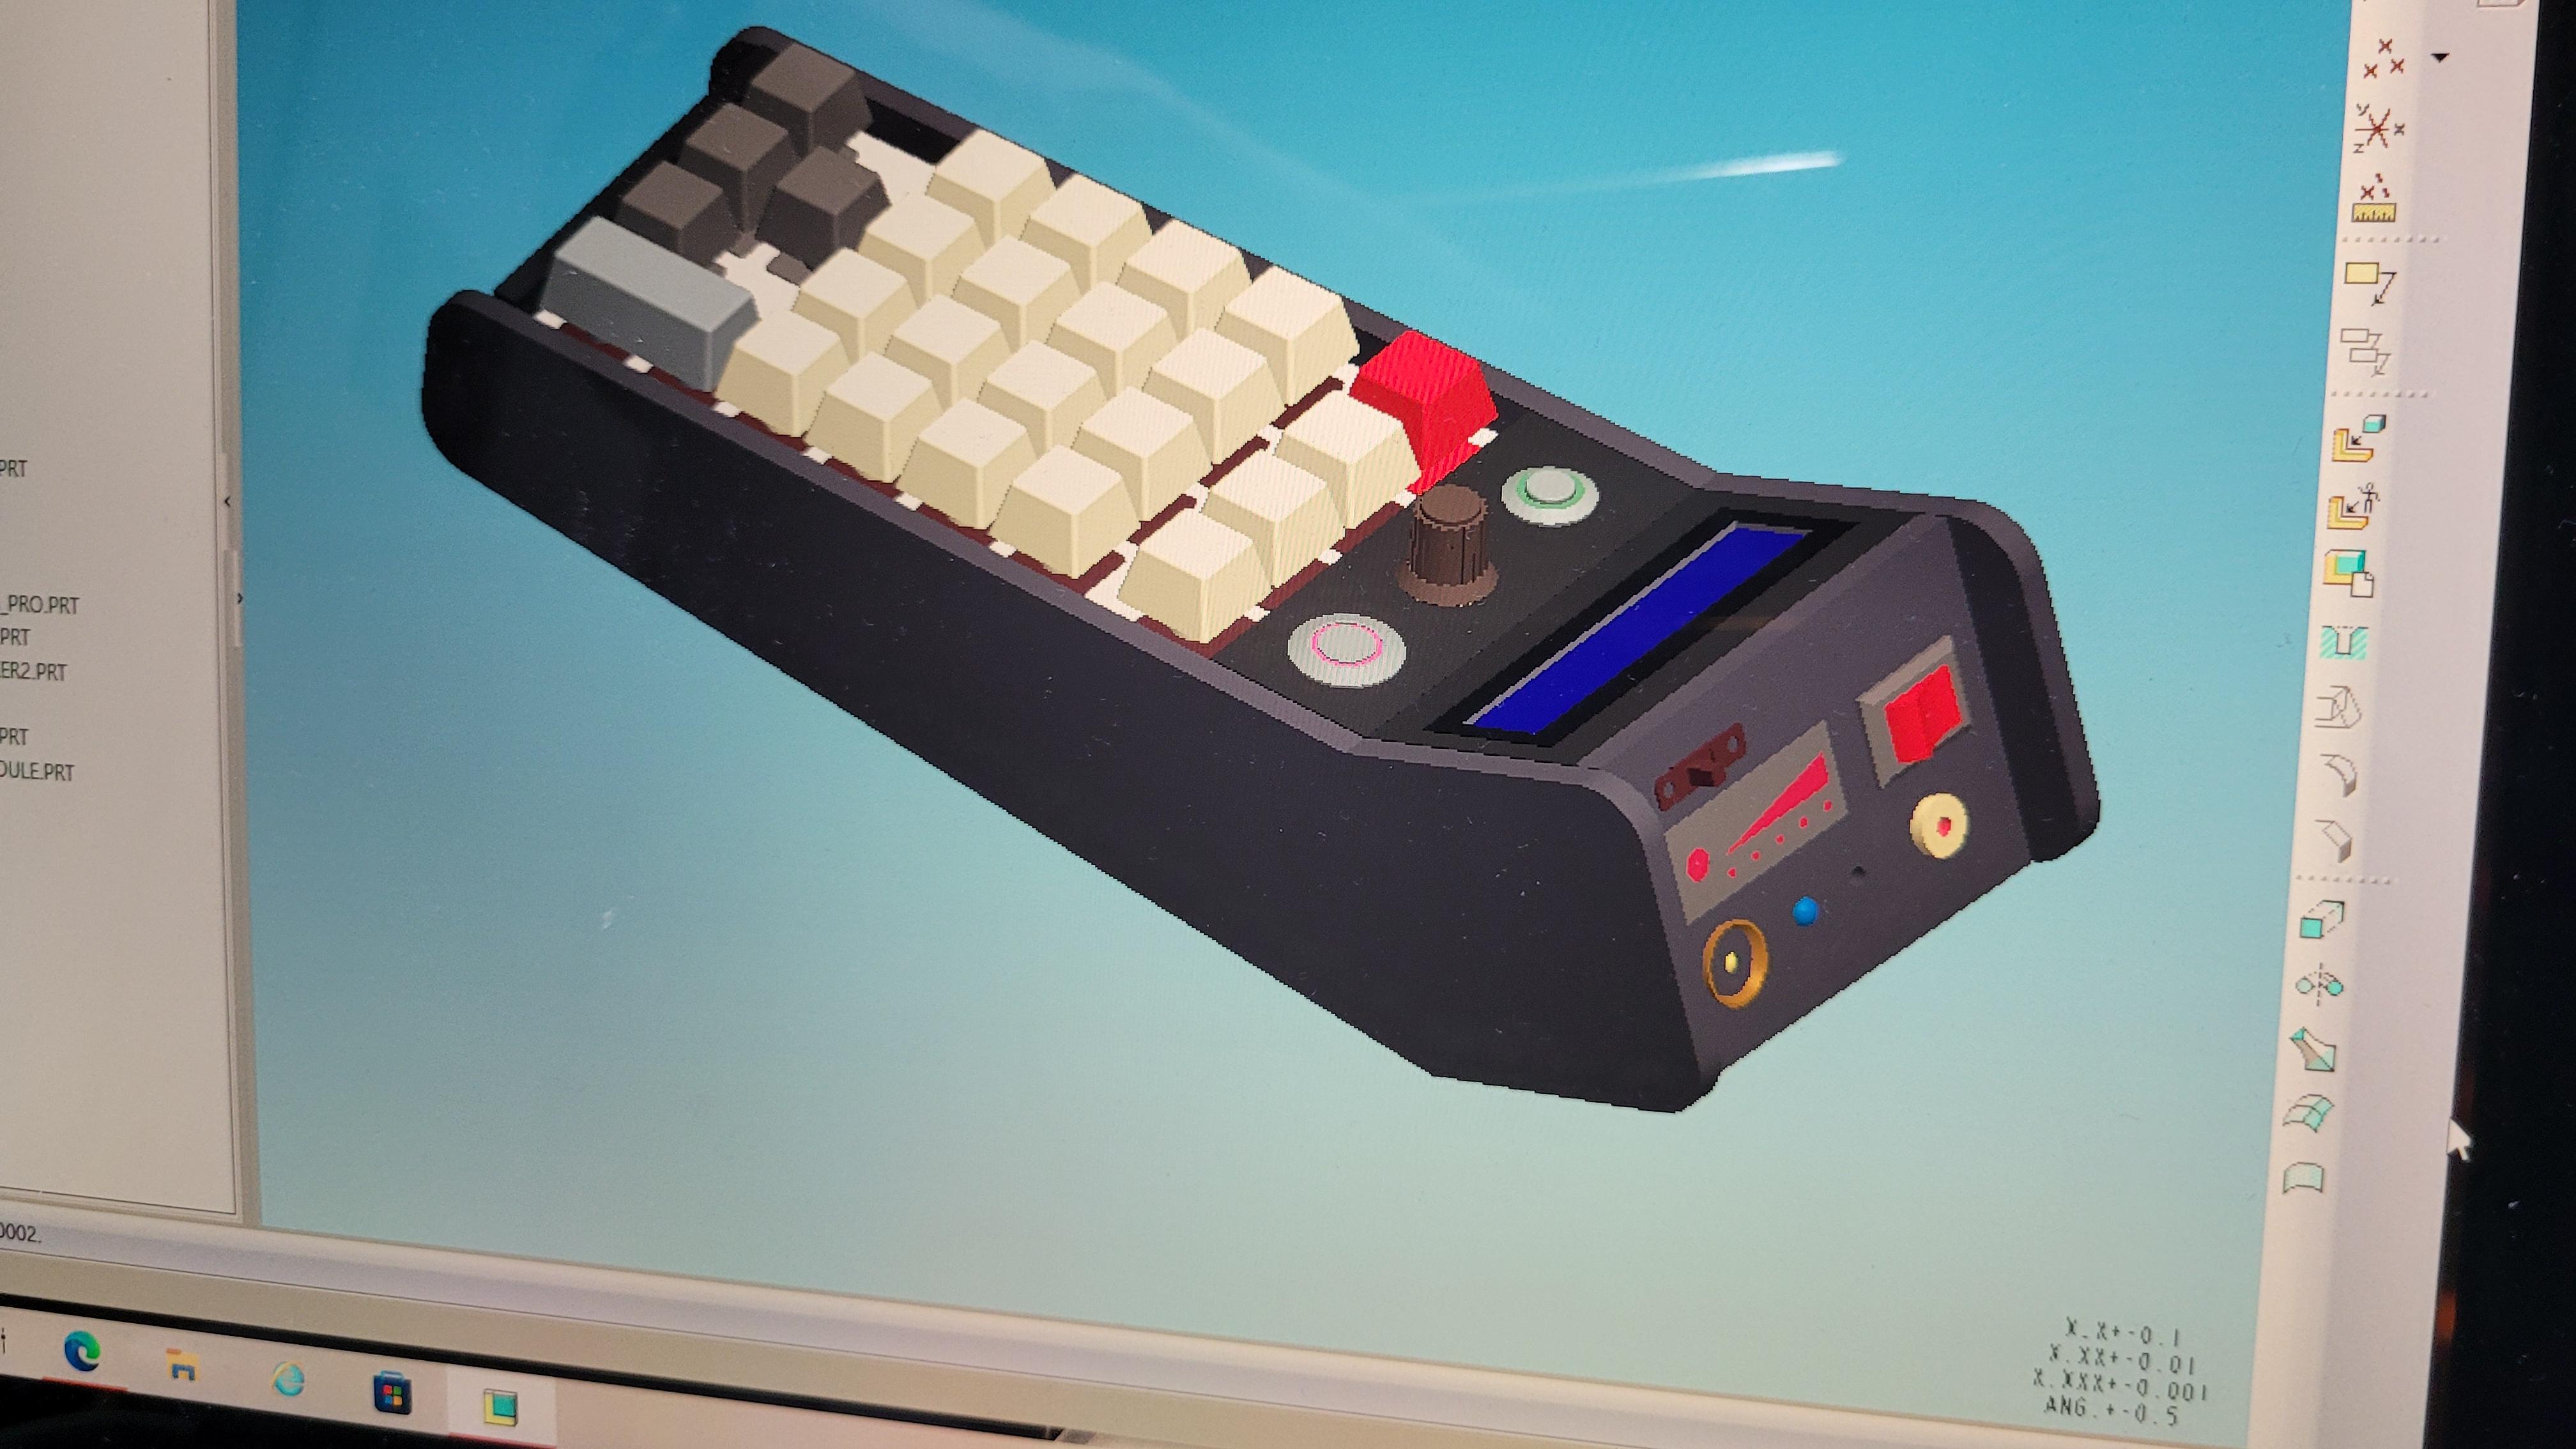
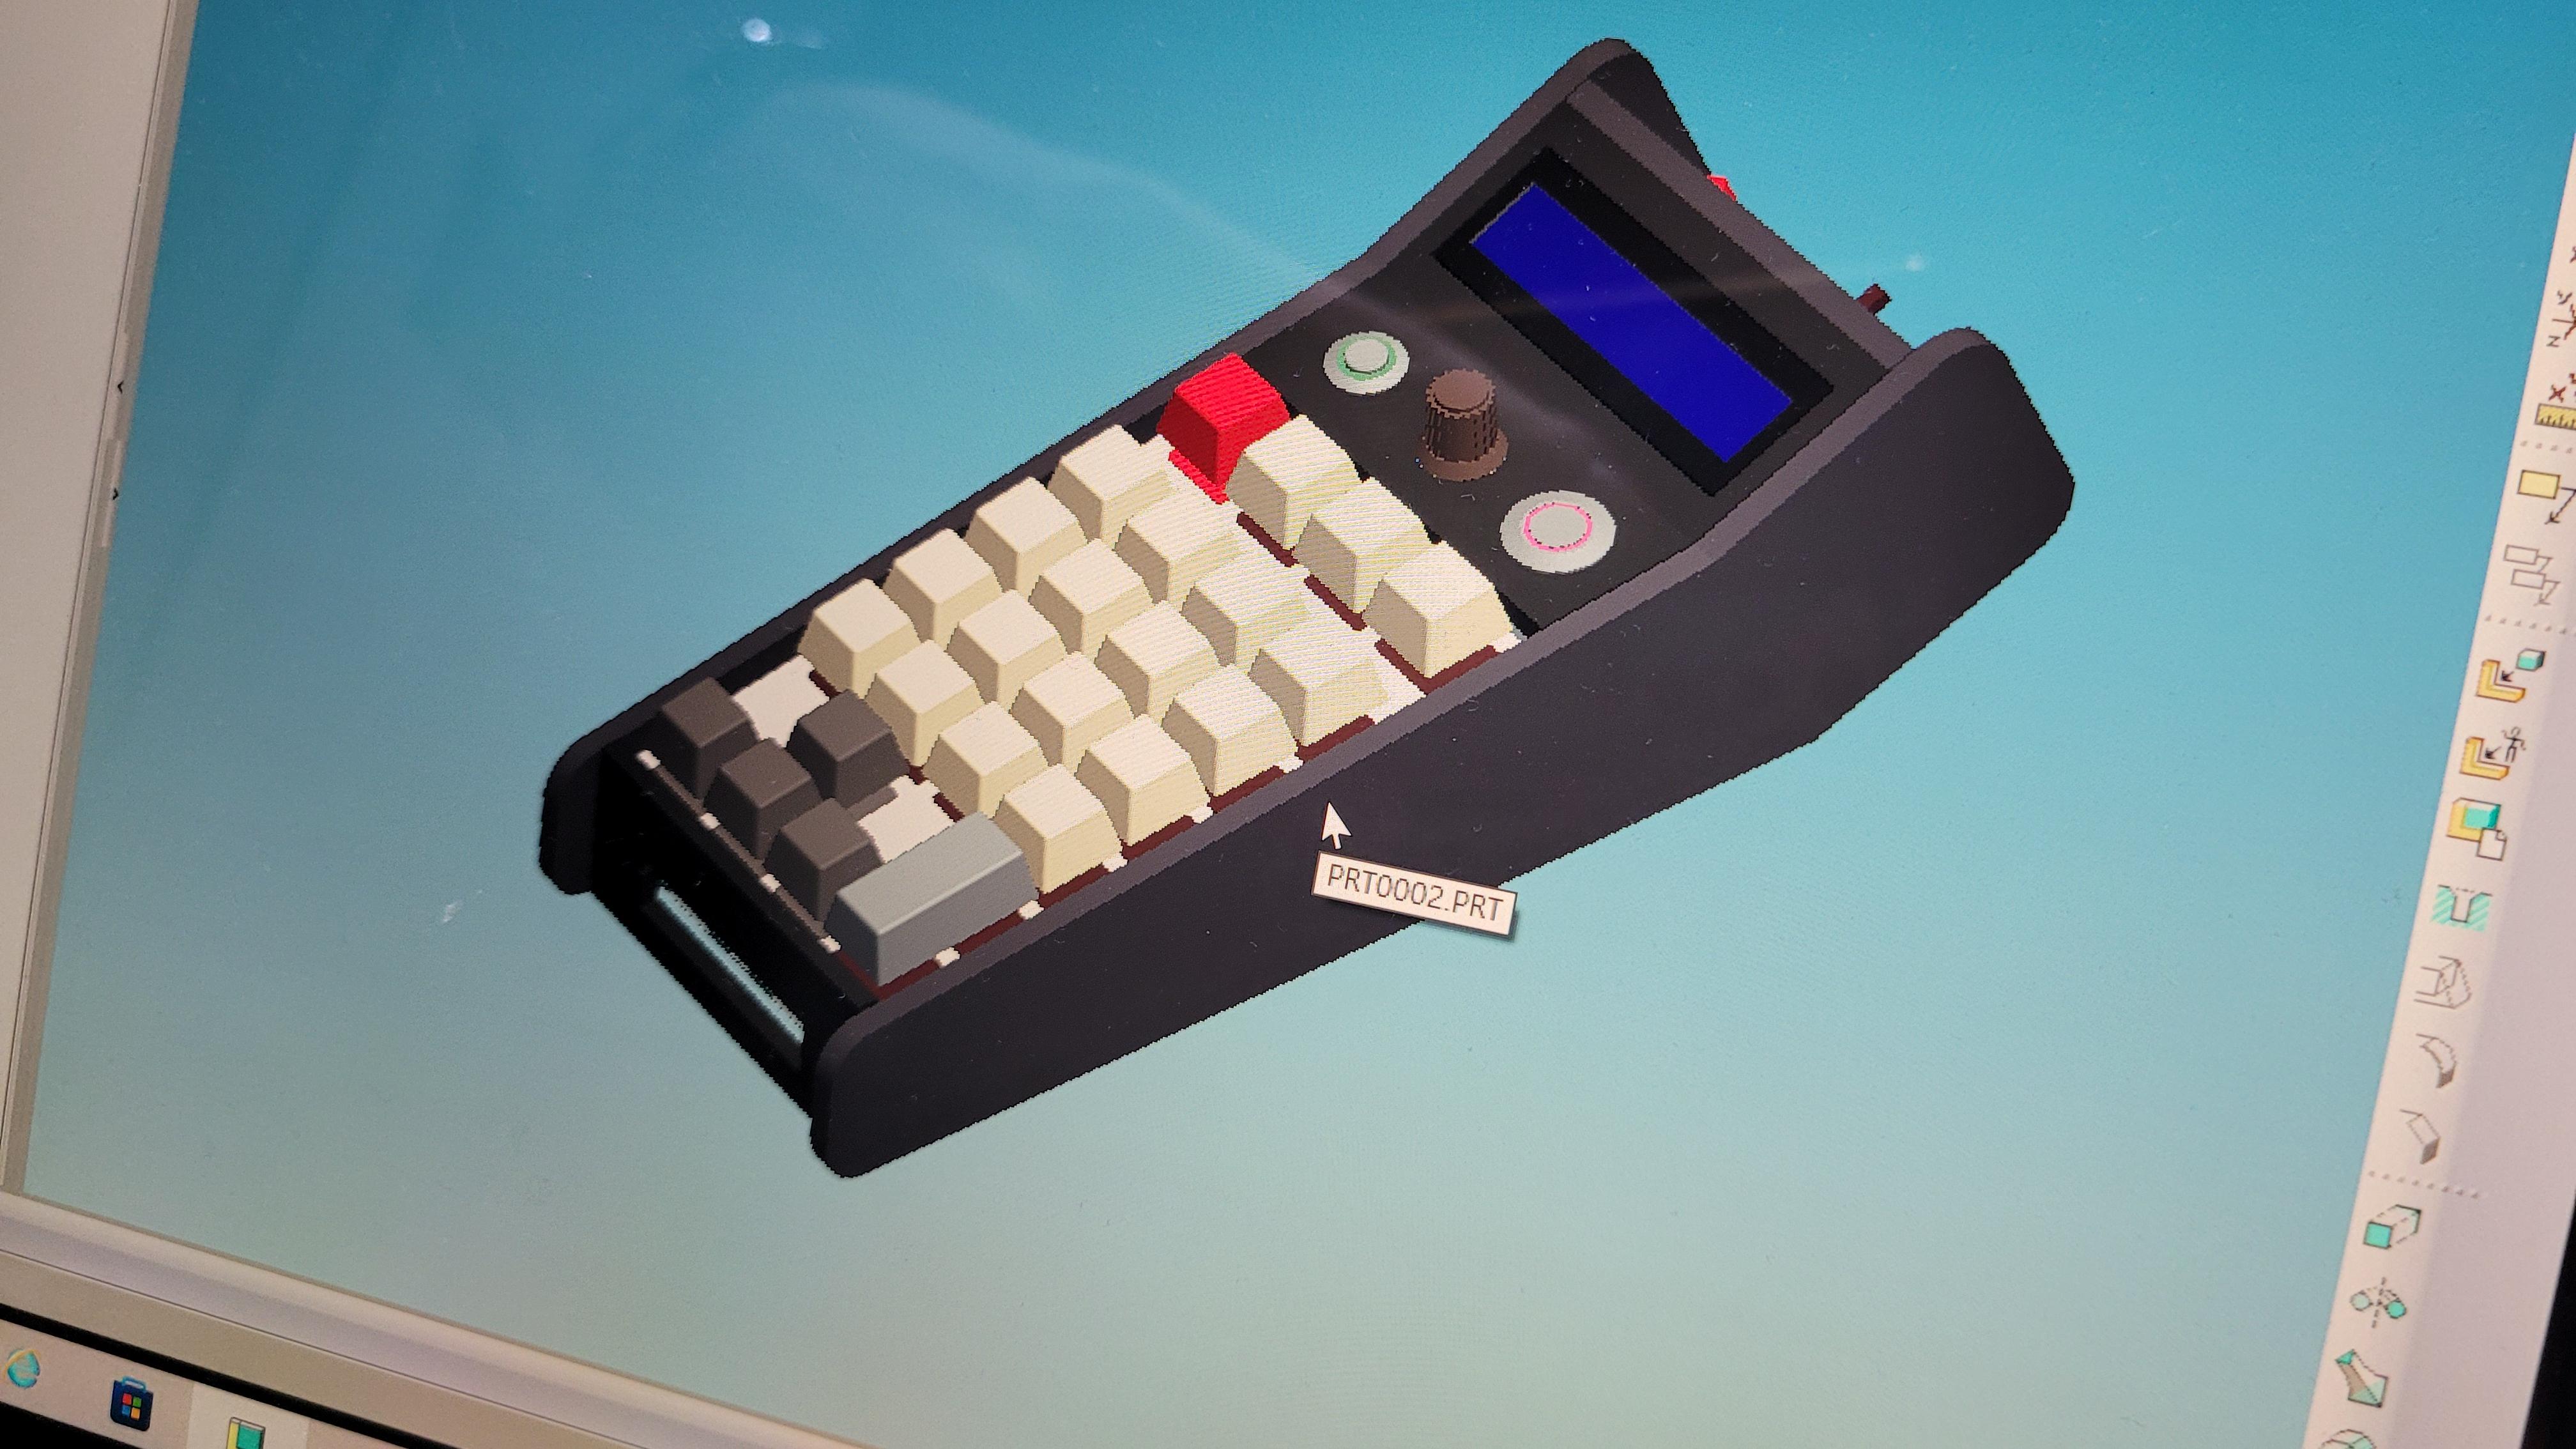
먼저 3D툴을 사용해서 설계를 해줍니다.
설계 단계에서 부품들의 간섭여부를 체크하고 배선이 지나갈 경로를 고려하여 부품배치를 해야 합니다.
이 과정이 가장 중요합니다.
부품 배치를 잘못한 경우 향후에 수정하려면 꽤나 고생하게 되거든요.

설계가 끝나면 설계된 파일을 사용하여 포맥스 재단용 도면을 A4용지에 출력가능한 형태로 작도하여 줍니다.
도면파일을 A4용지에 1:1로 출력한뒤 포맥스 파일에 붙여서 재단하면 정확한 사이즈의 부품을 만들어 낼 수 있습니다.
이렇게 만든 파츠들을 록타이트 접착제를 이용하여 붙여주면 아래와 같이 됩니다.

그 다음에는 사용할 기기들의 주파수 파형을 분석해야 합니다.
아래와 같이 적외선 리모컨 파형 분석기를 간이로 만들었습니다.
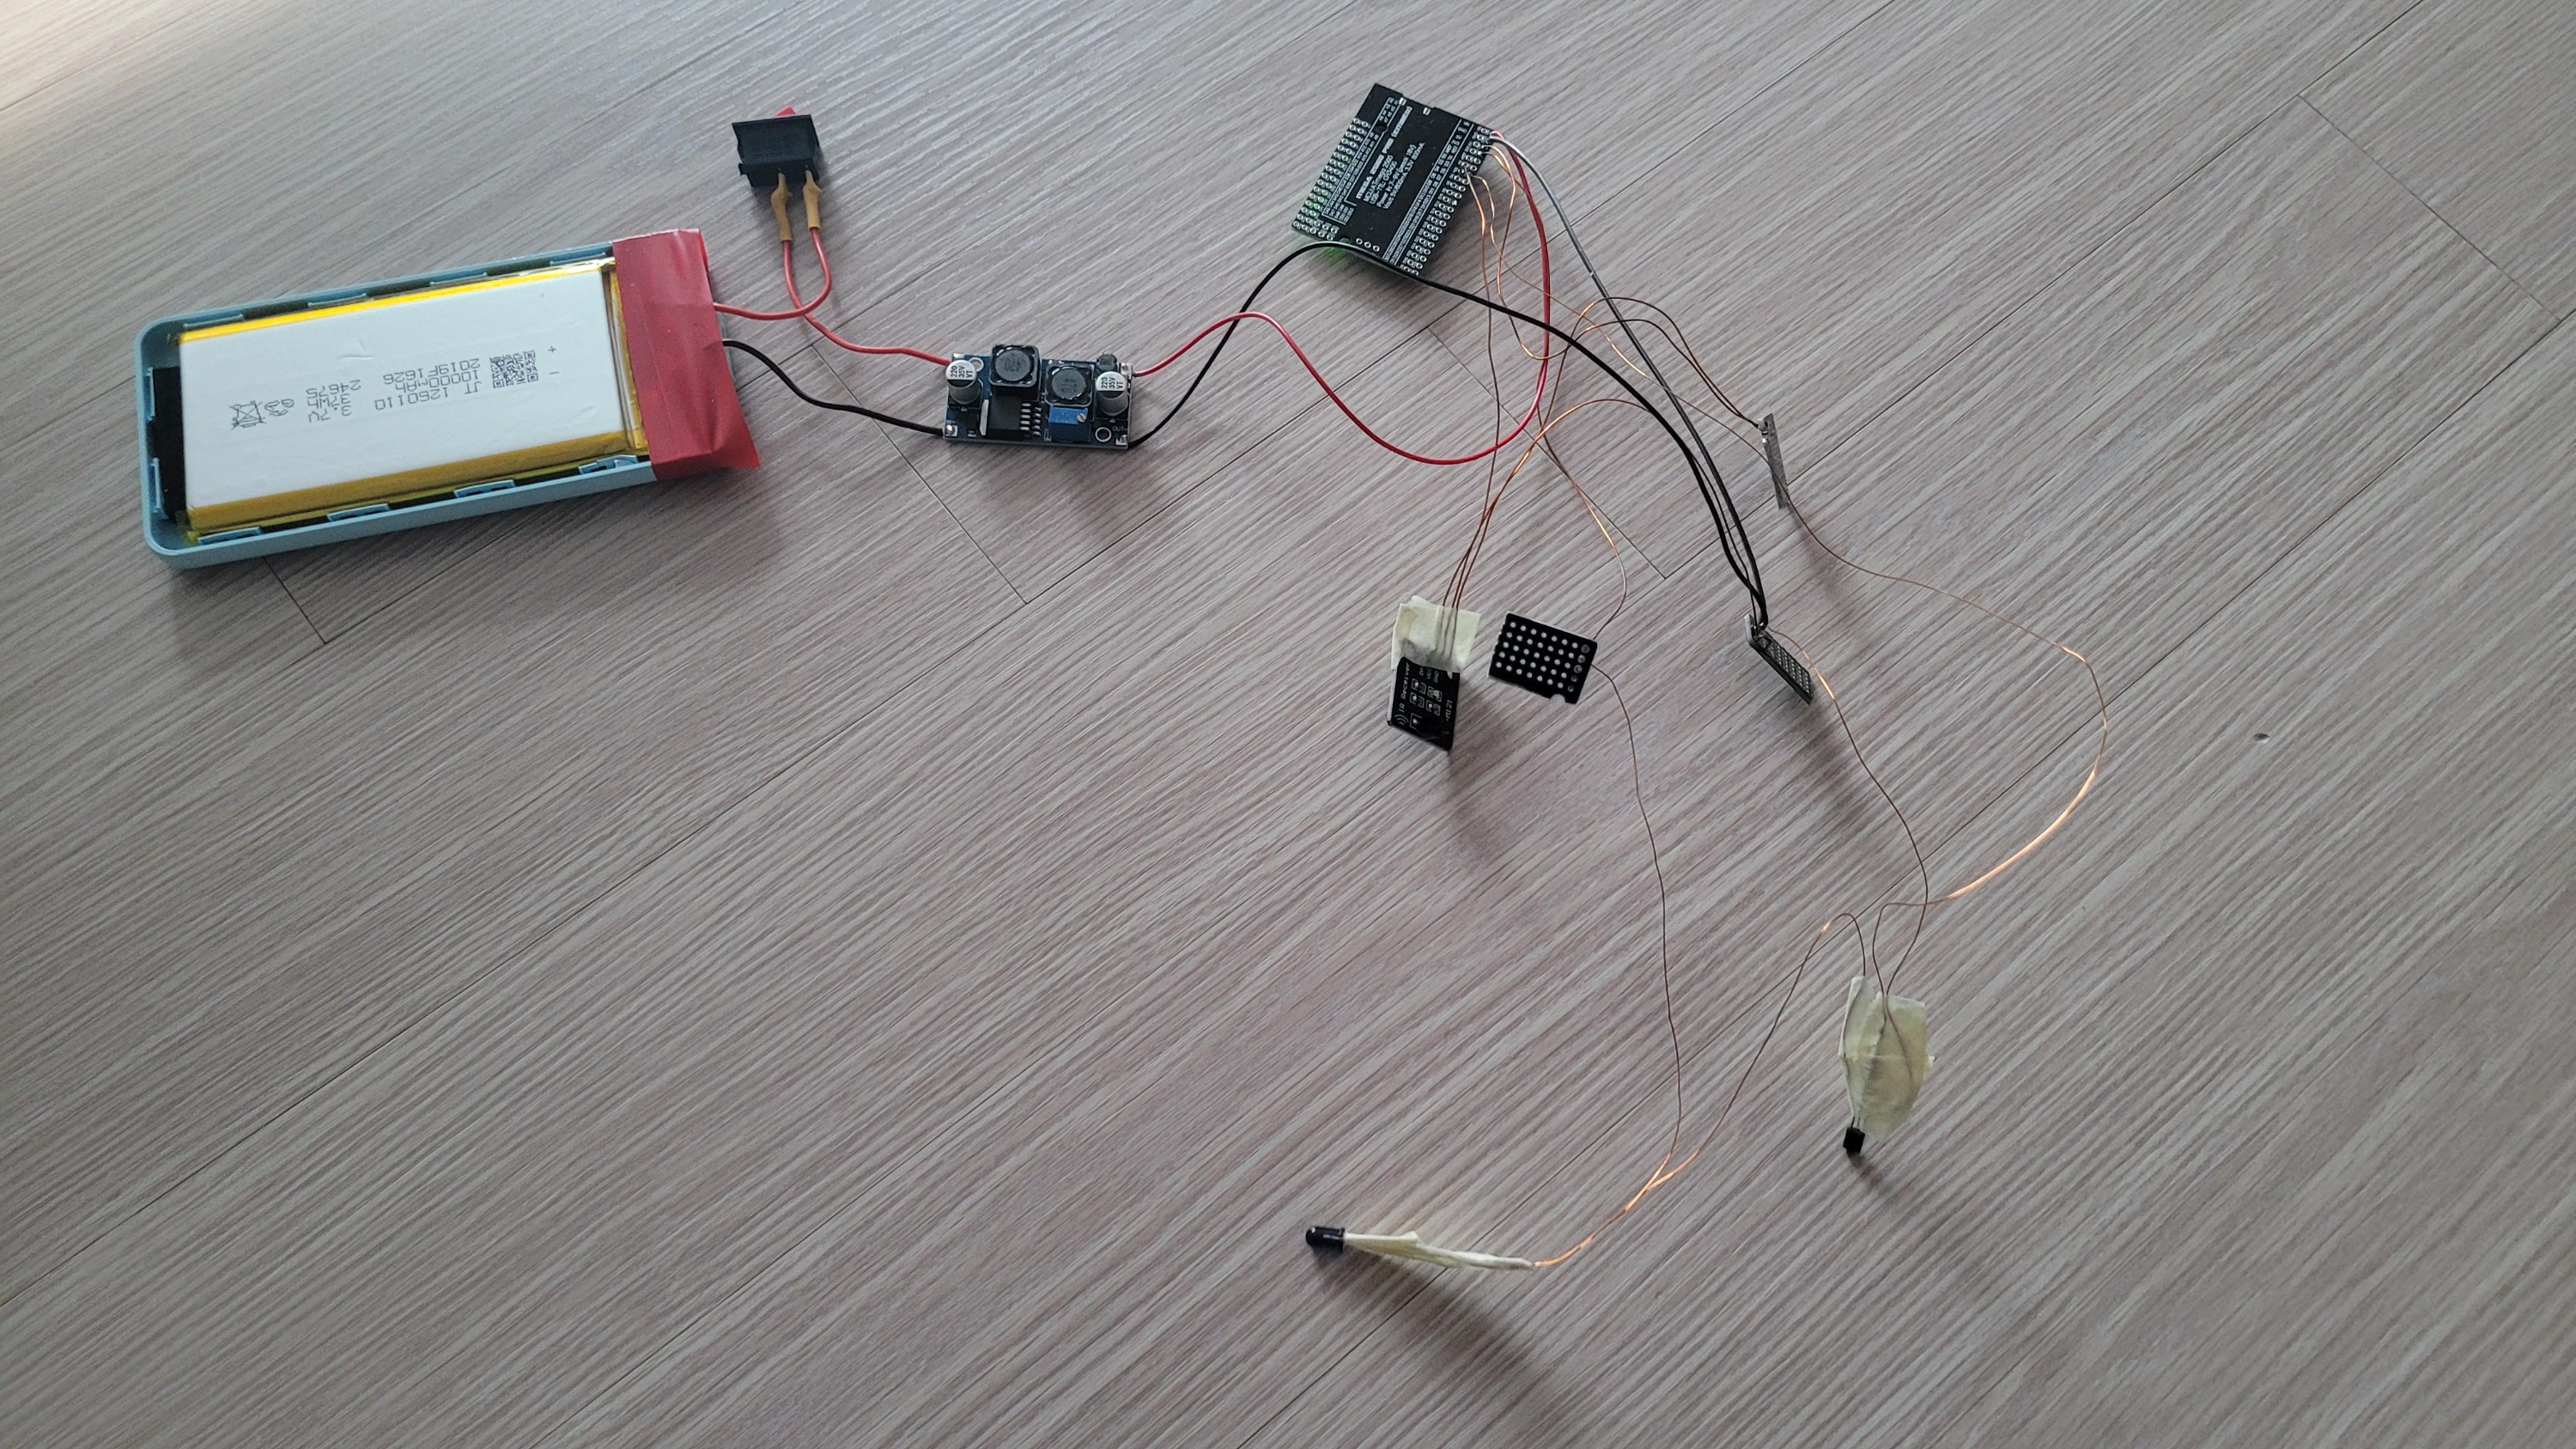
수신기에 사용할 코드는 아래의 코드를 사용했습니다.
#include <IRremote.h>

// Tell IRremote which Arduino pin is connected to the IR Receiver (TSOP4838)
#if defined(ESP32)
int IR_RECEIVE_PIN = 15;
#else
int IR_RECEIVE_PIN = 11;
#endif
IRrecv IrReceiver(IR_RECEIVE_PIN);

// Configure the Arduino
void setup() {
    pinMode(LED_BUILTIN, OUTPUT);

    Serial.begin(115200);   // Status message will be sent to PC at 9600 baud
#if defined(__AVR_ATmega32U4__) || defined(SERIAL_USB) || defined(SERIAL_PORT_USBVIRTUAL)
    delay(2000); // To be able to connect Serial monitor after reset and before first printout
#endif
    // Just to know which program is running on my Arduino
    Serial.println(F("START " __FILE__ " from " __DATE__ "\r\nUsing library version " VERSION_IRREMOTE));

    IrReceiver.enableIRIn();  // Start the receiver
    IrReceiver.blink13(true); // Enable feedback LED

    Serial.print(F("Ready to receive IR signals at pin "));
    Serial.println(IR_RECEIVE_PIN);
}

// The repeating section of the code
void loop() {
    if (IrReceiver.decode()) {  // Grab an IR code
        // Check if the buffer overflowed
        if (IrReceiver.results.overflow) {
            Serial.println("IR code too long. Edit IRremoteInt.h and increase RAW_BUFFER_LENGTH");
        } else {
            Serial.println("-----------------------------------------------------------------------------------------");                               // 2 blank lines between entries
            IrReceiver.printIRResultShort(&Serial);
            //Serial.println(F("Raw result in internal ticks (50 us) - with leading gap"));
            //IrReceiver.printIRResultRawFormatted(&Serial, false); // Output the results in RAW format
            //Serial.println(F("Raw result in microseconds - with leading gap"));
            //IrReceiver.printIRResultRawFormatted(&Serial, true);  // Output the results in RAW format
            Serial.println();                               // blank line between entries
            //Serial.println(F("Result as internal ticks (50 us) array - compensated with MARK_EXCESS_MICROS"));
            IrReceiver.compensateAndPrintIRResultAsCArray(&Serial, false);   // Output the results as uint8_t source code array of ticks
            //Serial.println(F("Result as microseconds array - compensated with MARK_EXCESS_MICROS"));
            IrReceiver.compensateAndPrintIRResultAsCArray(&Serial, true);    // Output the results as uint16_t source code array of micros
            IrReceiver.printIRResultAsCVariables(&Serial);  // Output address and data as source code variables

            IrReceiver.compensateAndPrintIRResultAsPronto(&Serial);

            /*
             * Example for using the compensateAndStorePronto() function.
             * Creating this String requires 2210 bytes program memory and 10 bytes RAM for the String class.
             * The String object itself requires additional 440 Bytes RAM from the heap.
             * This values are for an Arduino UNO.
             */
//        Serial.println();                                     // blank line between entries
//        String ProntoHEX = F("Pronto HEX contains: ");        // Assign string to ProtoHex string object
//        if (int size = IrReceiver.compensateAndStorePronto(&ProntoHEX)) {   // Dump the content of the IReceiver Pronto HEX to the String object
//            // Append compensateAndStorePronto() size information to the String object (requires 50 bytes heap)
//            ProntoHEX += F("\r\nProntoHEX is ");              // Add codes size information to the String object
//            ProntoHEX += size;
//            ProntoHEX += F(" characters long and contains "); // Add codes count information to the String object
//            ProntoHEX += size / 5;
//            ProntoHEX += F(" codes");
//            Serial.println(ProntoHEX.c_str());                // Print to the serial console the whole String object
//            Serial.println();                                 // blank line between entries
//        }
        }
        IrReceiver.resume();                            // Prepare for the next value
    }
}
간단히 설명하자면, 적외선 리모콘 신호는 국제적으로 규격이 통일되어 있지 않지만 주요 프로토콜들이 있습니다.
센서를 통해서 리모콘 신호를 받아서 신호를 디코딩 하여 어떤 프로토콜의 어떤 값을 사용했는지을 분석하는 소스입니다.
만약 프로토콜에 없는 경우엔 적외선 파형을 디지털값으로 기록하게끔 했습니다.
분석된 신호는 터미널을 통해 시리얼 데이터로 표현됩니다.
위의 코드를 기본으로 하여 필요한 기기들의 주파수를 기록해 둡니다.
예를 들면 사운드바의 적외선 코드는 아래와 같습니다.
 사운드바 (decode_type : 17, tbits : 32) // 누르고 있으면 아래의 주파수가 1번 출력후 4AB0F7B6 주파수만 연이어 출력 됨.(decode_type : 0, tbits : 32)
              34347887 : 전원
              3434E817 : 볼륨+
              34346897 : 볼륨-
              343451AE : F
              3434F807 : 음소거
또한 빔프로젝트 코드는 아래와 같습니다.
     빔프로젝트 (decode_type : 8, tbits : 32)
              CF20D : 전원 온
              C728D : 전원 오프
이런 식으로 필요한 기기들의 코드를 모두 정리해 둡니다.
이후에는 리모컨의 송신쪽 관련 코딩을 진행합니다.
아까 정리했던 기기들의 모든 코드를 적용하여면 아래와 같이 됩니다.
/* 라이브러리 */
#include <Arduino.h>
#include "PinDefinitionsAndMore.h" // Define macros for input and output pin etc.
#include <IRremote.hpp> //IRREMOTE 3.9.0 라이브러리 사용
#include <Wire.h>   // i2C 통신을 위한 라이브러리
#include <LiquidCrystal_I2C.h>               // LCD 1602 I2C용 라이브러리
LiquidCrystal_I2C lcd(0x27,16,2);     // 접근주소: 0x3F or 0x27

/* 변수 */

//키스위치 눌렀을때 LCD 표시시간
int key_disp_time = 100;

//로터리 스위치변수
int ro_switch_1_pin = 8;
(생략)

//키패드 스위치변수
int pu_switch_1_1_pin = 22;
int pu_switch_1_1_var = HIGH;
int pu_switch_1_2_pin = 23;
(생략)

uint8_t Repeats = 0;

/* 사운드바 */

//전원(1_1_1)
uint16_t Address_1_1_1 = 0x2C2C;
const uint16_t Command_1_1_1 = 0x1E;
const uint32_t data_1_1_1 = 0xE11E2C2C;

//사운드이펙트(1_1_2)
const uint16_t Address_1_1_2 = 0x2C2C;
const uint16_t Command_1_1_2 = 0x2F;
const uint32_t data_1_1_2 = 0xD02F2C2C;

//이퀄라이저(1_1_3)
const uint16_t Address_1_1_3 = 0x2C2C;
const uint16_t Command_1_1_3 = 0x2F;
const uint32_t data_1_1_3 = 0x67982C2C;
(생략)

/*  Samsung TV*/

//Power On/Off (2_1_1)
uint16_t Address_2_1_1 = 0x707;
uint16_t Command_2_1_1 = 0x2;
uint32_t data_2_1_1 = 0xFD020707;
(생략)

void setup() {
  //ir관련
  pinMode(LED_BUILTIN, OUTPUT);
  Serial.begin(115200);
  IrSender.begin(); // Start with IR_SEND_PIN as send pin and enable feedback LED at default feedback LED pin
  Serial.println(F("Ready to send IR signals at pin "  STR(IR_SEND_PIN)));

  // LCD
  lcd.init();                      // LCD 초기화
  lcd.backlight();                // 백라이트 켜기
  lcd.home();

  //로터리 스위치
  pinMode(ro_switch_1_pin,INPUT_PULLUP);
  pinMode(ro_switch_2_pin,INPUT_PULLUP);
  pinMode(ro_switch_3_pin,INPUT_PULLUP);
  (생략)

  //키패드 스위치
  pinMode(pu_switch_1_1_pin,INPUT_PULLUP);
  pinMode(pu_switch_1_2_pin,INPUT_PULLUP);
  pinMode(pu_switch_1_3_pin,INPUT_PULLUP);
  pinMode(pu_switch_1_4_pin,INPUT_PULLUP);
  (생략)
}

void loop() {

 if (digitalRead(ro_switch_1_pin) == LOW) {
    //lcd.clear();  //화면을 초기화 하고
    lcd.setCursor(0, 0);
    lcd.print("1.SoundBar      ");
    lcd.setCursor(0, 1);
    lcd.print("                ");
        if (digitalRead(pu_switch_1_1_pin) == LOW) {
           lcd.setCursor(0, 1);
           lcd.print("  Power On/Off  ");
           Serial.println("1번모드 1.1버튼");
           IrSender.sendSamsung(Address_1_1_1, Command_1_1_1, Repeats);
           delay(key_disp_time);
        }
        if (digitalRead(pu_switch_1_2_pin) == LOW) {
           lcd.setCursor(0, 1);
           lcd.print("  Back          ");
           Serial.println("1번모드 1.2버튼");
           IrSender.sendSamsung(Address_1_1_2, Command_1_1_2, Repeats);
           delay(key_disp_time);
        }
        if (digitalRead(pu_switch_1_3_pin) == LOW) {
           lcd.setCursor(0, 1);
           lcd.print("  Home          ");
           Serial.println("1번모드 1.3버튼");
           IrSender.sendSamsung(Address_1_1_3, Command_1_1_3, Repeats);
           delay(key_disp_time);
        }
        if (digitalRead(pu_switch_1_4_pin) == LOW) {
           lcd.setCursor(0, 1);
           lcd.print("  Exit          ");
           Serial.println("1번모드 1.4버튼");
           IrSender.sendSamsung(Address_1_1_4, Command_1_1_4, Repeats);
           delay(key_disp_time);
        }


        (생략)

            delay(10);
 } //ro스위치6 종료
}
(실제 코드는 너무 길어서 중간 중간 모두 생략처리 했습니다.)
이제 본격적인 제작에 들어갑니다.

스위치가 많아서 납땜포인트의 수가 너무 많습니다..납땜지옥...
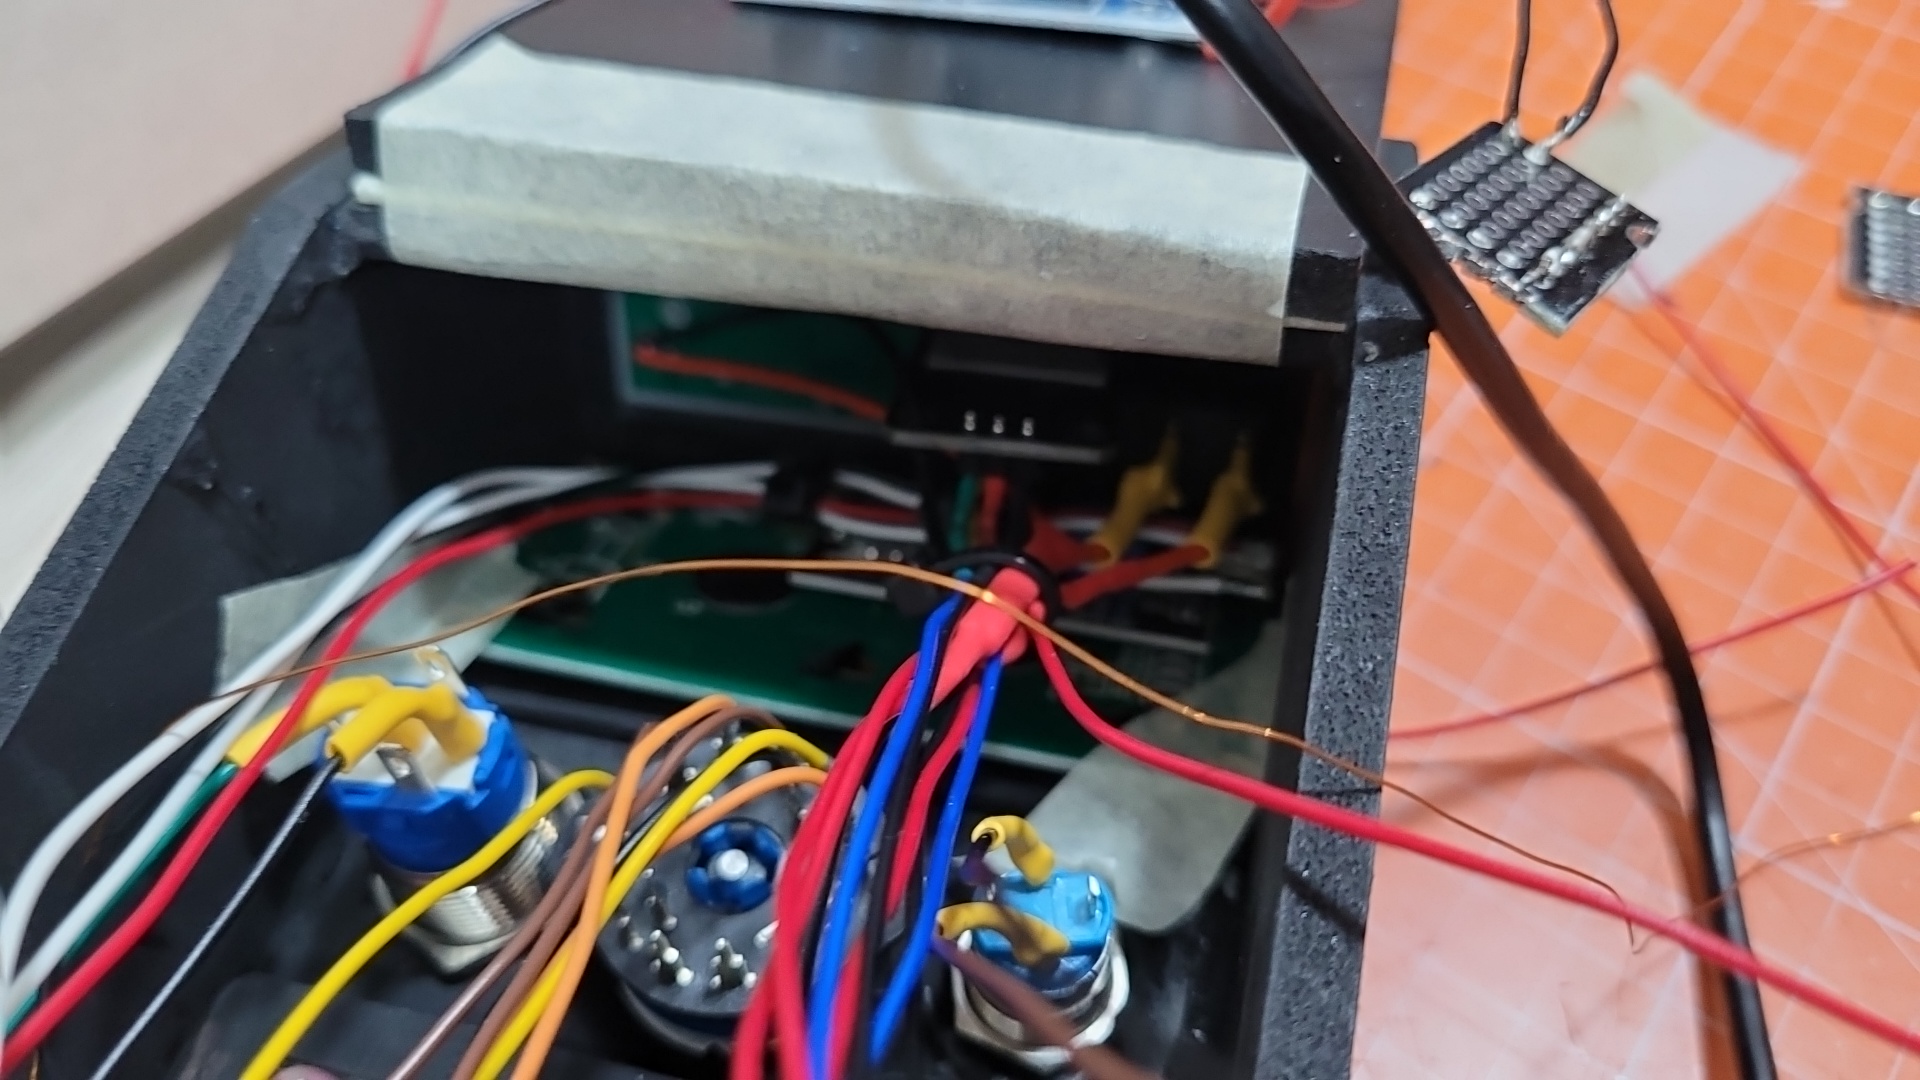
게다가 하우징 내부공간이 좁기 때문에 난이도도 높습니다...납땜지옥2...

무념무상으로 납땜을 하다보니 어찌어찌 대강 완료는 되었습니다.
사실 배선정리도 전혀 하지 않아서 뚜껑도 닫히지 않는 상태이고..마감도 개판입니다.
일단 잘 되는지 아닌지 확인을 해봐야겠죠.
간단한 제작기와 테스트 결과는 아래의 유튜브 동영상으로 보시기 바랍니다..
https://youtu.be/8j4E5klWm7w?si=VUyZz5o6YTSkJN9C
넵...그렇습니다..
일단 기능상 문제 없이 잘 되긴 합니다...만..
프로젝트를 한참 추진하던 중 오래동안 사용했던 텔레비전이 결국 수명을 다해버리고 말았던 것이었습니다.
위에는 언급하지 않았지만 리모컨을 만들면서 여러 우여곡절도 겪었는데요.
적외선 관련 라이브러리가 다양하고 버전별로도 지원기기나 사용방식이 각기 제각각이라 제가 가진 기기들을 전부 포용가능한 라이브러리를 찾기가 너무 힘들었다는 문제도 있었고,
무엇보다 가장 문제가 되었던 부분은 IR렌즈의 신호가 너무 약해 멀리서는 제대로 동작하지 않았다는 것인데요.
이를 극복하기 위해 IR렌즈를 해외구매하기도 했고 결국 트랜지스터를 사용해서 해결했었습니다.
이런 난관을 겪어가며 힘들게 만들었는데...
새로운 티비를 사고보니 제가 진행하던 통합리모컨 만들기 프로젝트는 뻘짓이 되어버렸습니다.
스마트티비는 그 자체가 기기의 허브역할을 하네요...미박스 같이 티비에 연결하는 제품들이 굳이 필요가 없네요.
통합리모컨이 필요가 없게 되었습니다...
그래서 거의 다 만들어서 조금 아깝긴 하지만..마무리를 짓지 않고...중단하게 되었습니다..
실패라기 보다는 부족한 성공이라고 하겠습니다...나름 만족..
'직접 만든 물건' 카테고리의 다른 글
| 이그렛 2 미니 개조(Taito Egret 2 mini Mod) - Odroid N2L+Rasberry PI Pico with GP2040 (10) | 2025.01.21 |
|---|---|
| 에어소프트건 무선 자동타겟 제작 (제작기) (4) | 2024.11.15 |
| Army Staccato C2 슬라이드 노치 강화 (0) | 2024.02.24 |
| 일렉기타 멀티 이펙터(GE-100)용 12v to 9v 컨버터 제작 (0) | 2022.12.12 |
| RC카(타미야 와일드윌리2) 도색 및 LED 개조 (0) | 2022.11.17 |


